# AlgorithmStar 实现 视觉 计算
*AlgorithmStar*
本文中将会演示通过 [AS 机器学习库](https://github.com/BeardedManZhao/algorithmStar.git) 实现 图像矩阵计算
## 目录
[TOC]

## 图像矩阵创建
我们可以在这里学习到如何创建一个图像矩阵操作数。
### 根据文件路径创建
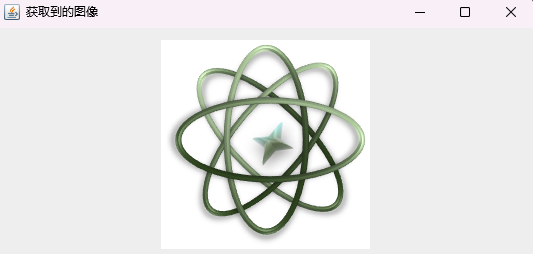
您可以安装下面的操作来进行图像矩阵的创建,这是一个通过文件路径来创建图像矩阵的代码操作。
```java
package top.lingyuzhao;
import io.github.beardedManZhao.algorithmStar.core.AlgorithmStar;
import io.github.beardedManZhao.algorithmStar.operands.matrix.ColorMatrix;
/**
* @author zhao
*/
public final class MAIN {
public static void main(String[] args) {
// 准备图像文件的路径
String imagePath = "C:\\Users\\zhao\\Downloads\\1698901556186.jpg";
// 将指定路径的图像文件解析成颜色矩阵
final ColorMatrix colors = AlgorithmStar.parseImage(imagePath);
// 查看图像
colors.show("获取到的图像");
}
}
```

### 根据文件URL创建
```java
import io.github.beardedManZhao.algorithmStar.core.AlgorithmStar;
import io.github.beardedManZhao.algorithmStar.operands.matrix.ColorMatrix;
import java.net.MalformedURLException;
import java.net.URL;
/**
* @author zhao
*/
public final class MAIN {
public static void main(String[] args) throws MalformedURLException {
// 准备图像文件的路径
final URL url = new URL("https://diskmirror.lingyuzhao.top/1/Binary/logo/%E3%80%8AalgorithmStar%20%E6%9C%BA%E5%99%A8%E5%AD%A6%E4%B9%A0%E3%80%8B%E7%9A%84%E5%B0%81%E9%9D%A2.jpg");
// 将指定路径的图像文件解析成颜色矩阵
final ColorMatrix colors = AlgorithmStar.parseImage(url);
// 查看图像
colors.show("获取到的图像");
}
}
```
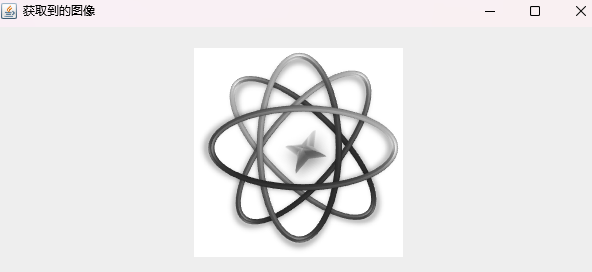
### 灰度图创建
灰度图的创建,与上面几乎一致,支持通过文件路径与文件的URL来进行创建,只是把调用的函数改为了 `parseGrayscaleImage`,在下面就是具体的实现方案!
```java
package top.lingyuzhao;
import io.github.beardedManZhao.algorithmStar.core.AlgorithmStar;
import io.github.beardedManZhao.algorithmStar.operands.matrix.ColorMatrix;
import java.net.MalformedURLException;
import java.net.URL;
/**
* @author zhao
*/
public final class MAIN {
public static void main(String[] args) throws MalformedURLException {
// 准备图像文件的路径
final URL url = new URL("https://diskmirror.lingyuzhao.top/1/Binary/logo/%E3%80%8AalgorithmStar%20%E6%9C%BA%E5%99%A8%E5%AD%A6%E4%B9%A0%E3%80%8B%E7%9A%84%E5%B0%81%E9%9D%A2.jpg");
// 将指定路径的图像文件解析成颜色矩阵
final ColorMatrix colors = AlgorithmStar.parseGrayscaleImage(url);
// 查看图像
colors.show("获取到的图像");
}
}
```
## 图像矩阵基本计算操作
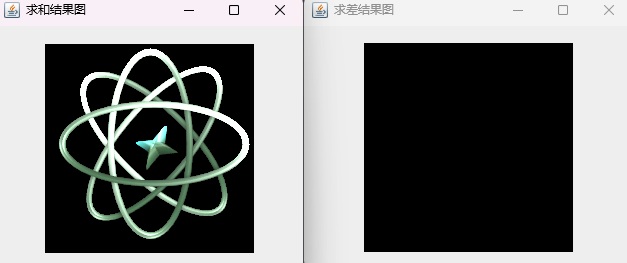
图像矩阵实现了 矩阵类型,对于矩阵类型来说图像矩阵是支持进行一些计算操作的,在这里我们演示一下 基本运算操作!
这个操作会将两个图像矩阵的每个对应像素点进行求和与求差计算,在这里我们提供了一个示例。
```JAVA
import io.github.beardedManZhao.algorithmStar.core.AlgorithmStar;
import io.github.beardedManZhao.algorithmStar.operands.matrix.ColorMatrix;
import java.net.MalformedURLException;
import java.net.URL;
/**
* @author zhao
*/
public final class Main {
public static void main(String[] args) throws MalformedURLException {
// 准备图像文件的路径
final URL url0 = new URL("https://diskmirror.lingyuzhao.top/1/Binary/logo/%E3%80%8AalgorithmStar%20%E6%9C%BA%E5%99%A8%E5%AD%A6%E4%B9%A0%E3%80%8B%E7%9A%84%E5%B0%81%E9%9D%A2.jpg");
// 将指定路径的图像文件解析成颜色矩阵
final ColorMatrix colors0 = AlgorithmStar.parseImage(url0);
final ColorMatrix colors1 = AlgorithmStar.parseImage(url0);
// 图像基本运算计算
colors0.agg(colors1, ColorMatrix.COLOR_SUM_REGULATE).show("求和结果图");
colors0.agg(colors1, ColorMatrix.COLOR_DIFF_REGULATE).show("求差结果图");
}
}
```
## 图像矩阵转换操作
> 在这里的一些转换计算操作也是具有 `isCopy` 参数的,如颜色反转就需要一个 布尔 类型的参数,这代表的就是是否需要将操作作用到新矩阵,如果选择的 true 则操作之前会拷贝一下矩阵,然后将矩阵反转再返回,反之则不拷贝。
> 不拷贝的计算性能将会更棒,但不拷贝计算,所有的结果图像都是指向同一份矩阵的,关于拷贝计算操作,可以在 https://www.lingyuzhao.top/LS-WebBackEnd/Article/12776952 查看到更详细的信息哦~~~
### 图像颜色反转
```java
import io.github.beardedManZhao.algorithmStar.core.AlgorithmStar;
import io.github.beardedManZhao.algorithmStar.operands.matrix.ColorMatrix;
import java.net.MalformedURLException;
import java.net.URL;
/**
* @author zhao
*/
public final class Main {
public static void main(String[] args) throws MalformedURLException {
// 准备图像文件的路径
final URL url0 = new URL("https://diskmirror.lingyuzhao.top/1/Binary/logo/%E3%80%8AalgorithmStar%20%E6%9C%BA%E5%99%A8%E5%AD%A6%E4%B9%A0%E3%80%8B%E7%9A%84%E5%B0%81%E9%9D%A2.jpg");
// 将指定路径的图像文件解析成颜色矩阵
final ColorMatrix colors0 = AlgorithmStar.parseImage(url0);
// 颜色反转 这里我们的函数接受的布尔参数就是操作是否要作用在原矩阵
colors0.colorReversal(false).show("原图");
}
}
```
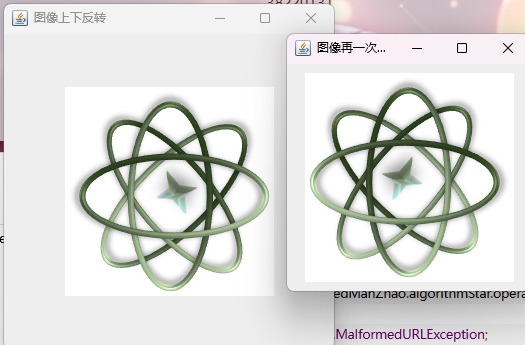
### 图像像素反转
这个操作就是将图像矩阵进行镜面反转操作,下面是一个示例~
```java
import io.github.beardedManZhao.algorithmStar.core.AlgorithmStar;
import io.github.beardedManZhao.algorithmStar.operands.matrix.ColorMatrix;
import java.net.MalformedURLException;
import java.net.URL;
/**
* @author zhao
*/
public final class Main {
public static void main(String[] args) throws MalformedURLException {
// 准备图像文件的路径
final URL url0 = new URL("https://diskmirror.lingyuzhao.top/1/Binary/logo/%E3%80%8AalgorithmStar%20%E6%9C%BA%E5%99%A8%E5%AD%A6%E4%B9%A0%E3%80%8B%E7%9A%84%E5%B0%81%E9%9D%A2.jpg");
// 将指定路径的图像文件解析成颜色矩阵
final ColorMatrix colors0 = AlgorithmStar.parseImage(url0);
// 图像反转 这里我们的函数接受的布尔参数就是操作是否要作用在原矩阵
colors0.reverseBT(false).show("图像上下反转");
colors0.reverseLR(false).show("图像再一次左右反转");
}
}
```
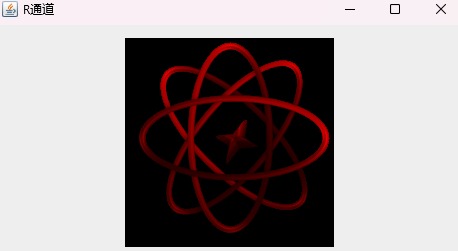
### 图像通道提取
```java
import io.github.beardedManZhao.algorithmStar.core.AlgorithmStar;
import io.github.beardedManZhao.algorithmStar.operands.matrix.ColorMatrix;
import io.github.beardedManZhao.algorithmStar.operands.matrix.IntegerMatrix;
import java.net.MalformedURLException;
import java.net.URL;
/**
* @author zhao
*/
public final class Main {
public static void main(String[] args) throws MalformedURLException {
// 准备图像文件的路径
final URL url0 = new URL("https://diskmirror.lingyuzhao.top/1/Binary/logo/%E3%80%8AalgorithmStar%20%E6%9C%BA%E5%99%A8%E5%AD%A6%E4%B9%A0%E3%80%8B%E7%9A%84%E5%B0%81%E9%9D%A2.jpg");
// 将指定路径的图像文件解析成颜色矩阵
final ColorMatrix colors0 = AlgorithmStar.parseImage(url0);
// 提取出R通道 的 矩阵对象
IntegerMatrix channel = colors0.getChannel(ColorMatrix._R_);
// 提取出R通道的 颜色矩阵对象
ColorMatrix colorChannel = colors0.getColorChannel(ColorMatrix._R_);
// 矩阵对象可以用来计算
IntegerMatrix add = channel.add(10);
// 颜色矩阵对象可以直接被展示
colorChannel.show("R通道");
}
}
```
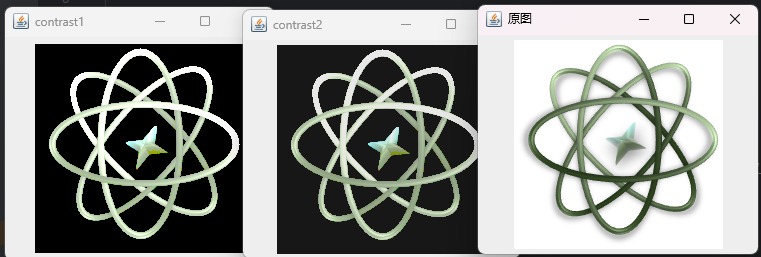
### 图像对比度调整
```
import io.github.beardedManZhao.algorithmStar.core.AlgorithmStar;
import io.github.beardedManZhao.algorithmStar.operands.matrix.ColorMatrix;
import java.net.MalformedURLException;
import java.net.URL;
/**
* @author zhao
*/
public final class Main {
public static void main(String[] args) throws MalformedURLException {
// 准备图像文件的路径
final URL url0 = new URL("https://diskmirror.lingyuzhao.top/1/Binary/logo/%E3%80%8AalgorithmStar%20%E6%9C%BA%E5%99%A8%E5%AD%A6%E4%B9%A0%E3%80%8B%E7%9A%84%E5%B0%81%E9%9D%A2.jpg");
// 将指定路径的图像文件解析成颜色矩阵
final ColorMatrix colors0 = AlgorithmStar.parseImage(url0);
colors0.show("原图");
// 调整对比度
colors0.contrast(128);
colors0.show("contrast1");
// 再次调整对比度
colors0.contrast(-23);
colors0.show("contrast2");
}
}
```
## 图像矩阵输出操作
### 输出到 BufferedImage
支持从图像矩阵中直接提取到 BufferedImage 来实现您灵活的数据输出操作
#### 性能优先的 BufferedImage 提取
这个方式的提取是非常快速的,因为它可以直接将矩阵对象中 BufferedImage 的引用指针返回!时间复杂度是 `O(1)`
```java
package org.example;
import io.github.beardedManZhao.algorithmStar.operands.matrix.ImageMatrix;
import javax.imageio.ImageIO;
import java.awt.image.BufferedImage;
import java.io.IOException;
import java.net.URL;
import java.nio.file.Files;
import java.nio.file.Paths;
/**
* @author zhao
*/
public class Main {
public static void main(String[] args) throws IOException {
// 转换为 图像矩阵
final ImageMatrix parse = (ImageMatrix) ImageMatrix.parse(new File("C:\\Users\\zhao\\Downloads\\无标题.png"));
// 重设大小
final ImageMatrix parse1 = parse.reSize(240, 240);
parse1.show("r");
// 获取到其中的图像缓存对象 这里的方法提取到的其实是内部的引用,只读情况使用很是推荐!
final BufferedImage image = (BufferedImage) parse1.toImage();
// 后面可以直接输出到数据流
ImageIO.write(image, "png", Files.newOutputStream(Paths.get("/xxx/xxx.png")));
}
}
```
#### 可修改的 BufferedImage 提取
这个情况所获取到的 BufferedImage 是根据矩阵类型绘制出来的一样的图像缓冲对象,这样的提取函数会有些性能损耗,提取到的 BufferedImage 与矩阵无任何关系,因此是可以修改的!
```java
package org.example;
import io.github.beardedManZhao.algorithmStar.operands.matrix.ImageMatrix;
import javax.imageio.ImageIO;
import java.awt.image.BufferedImage;
import java.io.File;
import java.io.IOException;
import java.nio.file.Files;
import java.nio.file.Paths;
/**
* @author zhao
*/
public class Main {
public static void main(String[] args) throws IOException {
// 转换为 图像矩阵
final ImageMatrix parse = (ImageMatrix) ImageMatrix.parse(new File("C:\\Users\\zhao\\Downloads\\无标题.png"));
// 重设大小
final ImageMatrix parse1 = parse.reSize(240, 240);
parse1.show("r");
// 获取到其中的图像缓存对象
final BufferedImage image = parse1.copyToNewImage();
// 后面可以直接输出到数据流
ImageIO.write(image, "jpg", Files.newOutputStream(Paths.get("C:\\Users\\zhao\\Downloads\\15881908_codebook.lingyuzhao.top_jks\\xxx.png")));
}
}
```
------
***操作记录***
作者:[algorithmStar](https://www.lingyuzhao.top//index.html?search=23 "algorithmStar")
操作时间:2025-01-01 12:59:43 星期三 【时区:UTC 8】
事件描述备注:保存/发布
中国 天津
[](如果不需要此记录可以手动删除,每次保存都会自动的追加记录)